
How to Choose the Right CNC Vise for Your Machining Application
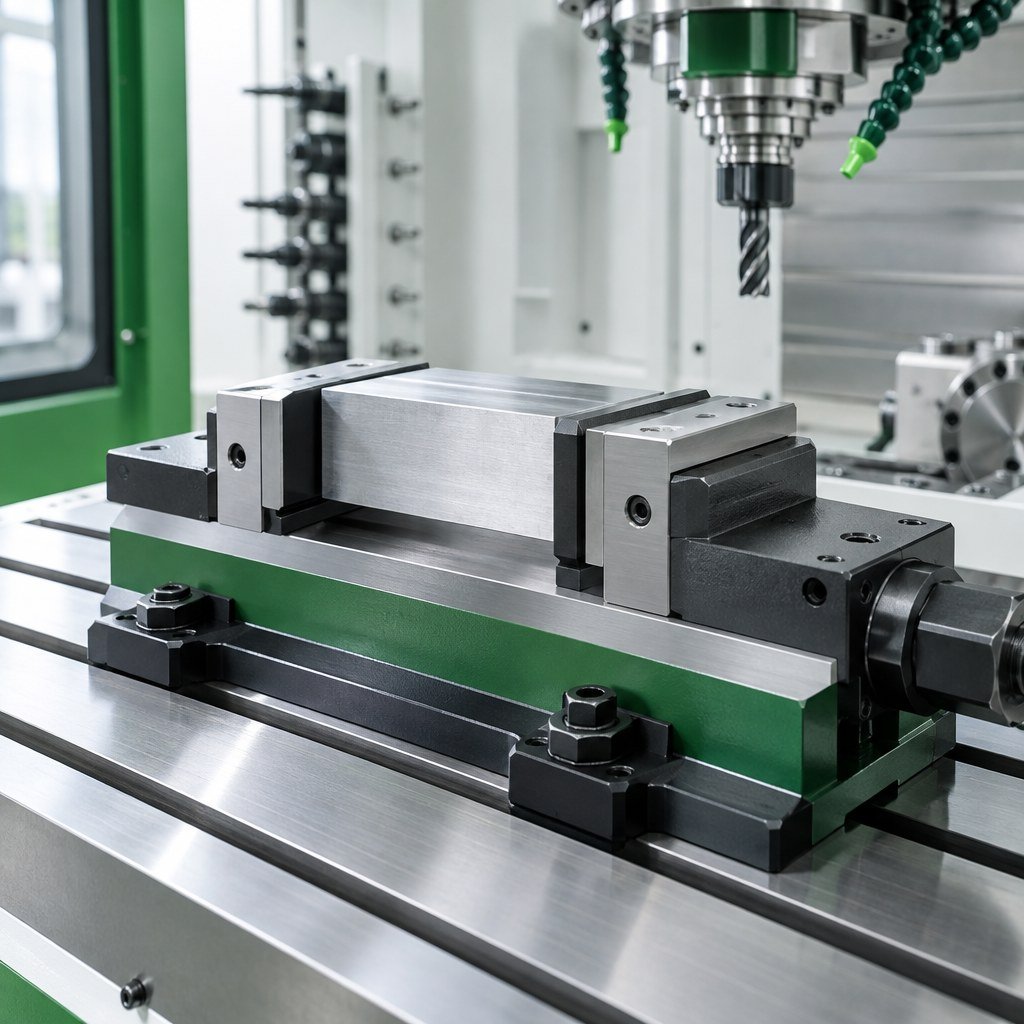
Choosing the right CNC vise starts with the part you need to machine—not simply the largest vise that fits your table. The best CNC vise for an application provides enough holding force and rigidity, leaves the cutting tool access to the required surfaces, fits the machine envelope, and supports the production volume and changeover frequency. Before buying, compare workpiece dimensions, material, machining forces, required access, repeatability, and whether manual or automated clamping makes sense.
This guide explains the main CNC vise types, the specifications that matter, and how to match a vise to common milling applications. Use it as a practical checklist before comparing individual models.
1. Start with the Machining Application
Define what the vise must do before comparing models. A vise that works well for a small aluminum component may not be suitable for a heavy steel part, a tall workpiece, or a five-axis operation that needs access to several faces.
- Workpiece dimensions: Record the minimum and maximum width, height, length, and any features that affect jaw contact.
- Material: Aluminum, steel, stainless steel, and delicate or thin-wall materials behave differently under clamping pressure and cutting loads.
- Operations: Consider roughing, finishing, drilling, tapping, contouring, and the number of faces to be machined.
- Production volume: One-off jobs, short runs, and high-volume production have different setup and loading priorities.
- Machine configuration: Check table size, available travel, tool reach, spindle clearance, and whether the machine uses a rotary table or a five-axis setup.
Write down the most demanding job the vise must handle, not just the most common job. Then confirm that the vise can safely support that job within the manufacturer’s specifications.
2. Understand the Main Types of CNC Vises
Standard or manual CNC vise
A manual vise is a practical choice for general milling, maintenance work, prototypes, and varied low-volume jobs. It is straightforward to operate and does not require a pneumatic supply or hydraulic power unit. Its main limitation in repetitive production is that loading and clamping depend on the operator, so cycle consistency and changeover time can vary.
Self-centering vise
A self-centering vise moves opposing jaws symmetrically toward the center, helping position a workpiece around the vise centerline. This can be useful when machining features from both sides or when a repeatable center reference simplifies setup. Confirm the model’s jaw travel, clamping range, mounting method, and whether the mechanism suits the part geometry.
Explore JIYAN’s self-centering vise range when centered positioning is important to your process.
Pneumatic or hydraulic vise
Powered vises can reduce manual clamping effort and support more consistent loading in repeat production. Pneumatic systems use compressed air; hydraulic systems use hydraulic pressure and may be selected where the application calls for a different force and system arrangement. The right choice depends on the required clamping force, available utilities, safety design, cycle frequency, and machine integration. Do not assume that every powered vise is suitable for unattended operation without the necessary sensing, guarding, and process validation.
For a more detailed comparison, see JIYAN’s pneumatic vs. hydraulic vise guide.
Low-profile and five-axis workholding vises
Five-axis machining often requires a compact fixture that keeps the workpiece secure while leaving room for the tool and spindle to reach multiple faces. A low-profile vise, compact jaw arrangement, or purpose-designed five-axis fixture can help reduce obstruction. The correct option depends on the part, tool length, rotary motion, and the machine’s collision envelope—not on the label “five-axis” alone.
Review the considerations in JIYAN’s five-axis workholding guide before selecting a fixture for multi-face machining.
3. Compare the Specifications That Affect Performance
| Specification | Why it matters | What to verify |
|---|---|---|
| Jaw opening | Determines the maximum workpiece width the vise can accept. | Required opening plus allowance for jaw and part geometry. |
| Jaw width and height | Affects contact area, access, and support. | Whether the part has enough stable contact without obstructing the tool. |
| Clamping force | Helps resist cutting loads, but excessive force can deform a part. | Manufacturer-rated force, operating method, and recommended torque or pressure. |
| Repeatability | Influences how consistently a part can be located between setups. | How the figure is defined and measured, and whether it applies to the complete setup. |
| Body height and footprint | Influences tool access, machine travel, and fixture clearance. | Full dimensions, mounting pattern, and collision envelope. |
| Mounting interface | Determines how the vise attaches to the machine or fixture plate. | Slot, bolt pattern, locating keys, adapter plate, or quick-change interface. |
| Jaw options | Can improve support for unusual shapes or repeat jobs. | Compatible soft jaws, step jaws, replaceable jaws, and custom options. |
Compare specifications using the same definitions. For example, a repeatability figure for a locating mechanism is not automatically the same as the overall accuracy of a machined part. Actual results also depend on the machine, fixture installation, cleanliness, workpiece condition, and measurement method.
4. Match the Vise to the Workpiece Material and Geometry
Aluminum and other softer materials
Soft materials may be marked or distorted if clamping pressure is too high or the contact area is too small. Consider broad, clean contact surfaces, suitable jaw inserts, and a clamping method that supports the part without damaging finished faces. For thin-wall parts, verify the support strategy before increasing clamping force.
Steel and heavier cutting loads
Heavy roughing can produce substantial cutting forces. Select a rigid vise and mounting arrangement that are rated for the application, and check that the workpiece cannot lift, rotate, or shift under load. Keep chips from packing between the workpiece and jaw faces, and follow the manufacturer’s operating instructions.
Irregular, small, or thin-wall parts
Standard flat jaws may not provide adequate support for complex geometry. Soft jaws, shaped jaws, stops, or a dedicated fixture may improve contact and repeatability. For thin-wall parts, evaluate the risk of deformation and consider supporting the workpiece close to the cutting zone. Always validate the setup with a controlled test before running production.
5. Choose Jaw Travel and Clamping Range Carefully
Do not select a vise based only on its maximum opening. Check the actual clamping range for the jaw configuration you plan to use. A part that technically fits may still sit too high, contact the jaws on a small area, or leave insufficient room for the cutter.
- List the smallest and largest workpiece widths in the job family.
- Check whether one vise can cover the range without compromising jaw engagement.
- Confirm the part can be loaded and unloaded without contacting nearby fixtures or machine components.
- Check whether dedicated jaws or a second vise would improve stability for outlier parts.
If one vise must handle many part sizes, consider the time spent changing jaws and resetting stops. A flexible setup is useful only when it remains safe and repeatable.
6. Consider Tool Access and the Number of Machined Faces
For three-axis machining, the main priority may be secure top-side access and enough clearance for the cutter. For four- and five-axis machining, the fixture must also account for rotary movement, tool orientation, and possible collisions as the machine changes angle.
Before choosing a vise, review the model or physical setup with the longest tool, largest tool holder, and most demanding toolpath. Check the spindle, holder, vise body, jaws, workpiece, and rotary table through the full intended motion. A compact vise may improve access, but it must still provide sufficient support and clamping capacity.
7. Decide Whether Manual or Powered Clamping Fits Production
Manual clamping is often appropriate for mixed jobs and low production volume. Powered clamping can be useful when the same loading process repeats frequently, several fixtures are operated in a cycle, or a machine is integrated with automation.
When evaluating powered clamping, include more than the vise purchase price. Consider air or hydraulic supply, control and sensing, maintenance, setup validation, safety interlocks, and the cost of integrating the system into the machine. A powered vise alone does not make a process ready for lights-out production; the complete loading, clamping, machining, and fault-recovery process must be validated.
8. Think About Quick Change and Setup Time
If jobs change frequently, the time needed to remove, align, and indicate a vise can become a significant part of total setup time. A quick-change or zero-point workholding interface may help standardize fixture positioning and make changeovers more repeatable, provided the machine, fixture, and interface are compatible.
Learn more about JIYAN’s zero-point clamping systems to understand how a quick-change interface may fit into your setup strategy. Evaluate the complete system, including the base, locating interface, clamping method, workholding fixture, and machine table.
9. Common CNC Vise Selection Mistakes
- Choosing by price alone: A lower initial price may not reflect the time spent on setup, jaw changes, maintenance, or part rework.
- Ignoring tool access: A vise that holds securely can still block a required machining face.
- Overlooking workpiece deformation: More clamping force is not always better, especially for thin-wall or soft materials.
- Assuming repeatability guarantees part accuracy: Machine condition, tool deflection, thermal effects, and setup quality also matter.
- Forgetting the mounting interface: Confirm bolt patterns, locating features, table compatibility, and available adapters.
- Buying for one job only: Consider the full family of parts the vise is expected to hold.
10. A Practical CNC Vise Selection Checklist
Before ordering, confirm each of the following:
- Workpiece dimensions, material, and geometry are documented.
- Jaw opening, jaw travel, and contact area suit the complete part range.
- Clamping force and fixture rigidity suit the intended cutting loads.
- Required faces remain accessible to the cutter and tool holder.
- Mounting dimensions and locating interfaces match the machine or fixture plate.
- Repeatability and accuracy specifications are clearly defined.
- Manual, pneumatic, or hydraulic operation matches production needs and available utilities.
- Jaw options, maintenance requirements, and future part changes have been considered.
- The complete setup has been checked for interference and validated safely before production.
Frequently Asked Questions
What is the best CNC vise for general milling?
There is no single best vise for every job. Start with workpiece size, material, cutting loads, required access, and production volume. A standard manual vise may suit general low-volume milling, while self-centering, low-profile, or powered vises may better suit specific positioning or production requirements.
How do I choose the right CNC vise size?
Check the jaw opening and usable clamping range against the smallest and largest workpieces, then verify jaw engagement, body height, mounting dimensions, and tool clearance. Maximum opening alone is not enough to confirm suitability.
When should I use a self-centering vise?
A self-centering vise is useful when positioning a workpiece around the vise centerline helps the machining process, such as when working on opposing sides or repeating centered setups. Confirm the jaw travel and part geometry are compatible with the model.
Is a pneumatic CNC vise better than a manual vise?
Not in every application. Pneumatic clamping can reduce manual effort and support repeat production, but it requires a suitable air supply and a properly designed control and safety arrangement. A manual vise may be simpler and more economical for varied, low-volume jobs.
What matters most when choosing a vise for five-axis machining?
Tool access and collision clearance are critical, along with secure clamping, rigidity, and mounting compatibility. Check the complete machine motion with the intended tool, holder, workpiece, vise, and rotary table before committing to a setup.
Does vise repeatability equal machining accuracy?
No. Repeatability describes consistency under a defined measurement method; it does not by itself guarantee the accuracy of the finished part. Machine condition, tool and workpiece behavior, fixture installation, temperature, and measurement practice also influence the result.
Should I choose a quick-change or zero-point system?
It is worth evaluating when fixture changeovers are frequent or when repeatable fixture positioning is important. Check interface compatibility, required clamping capacity, cleanliness, operating method, and the economics of the complete setup before deciding.
Conclusion: Choose for the Whole Process, Not Just the Vise
The right CNC vise matches the workpiece, machining forces, tool access, machine interface, and production workflow. Start with the part family and the most demanding operation, compare specifications using consistent definitions, and validate the complete setup before production. If your application requires centered positioning, powered clamping, five-axis access, or faster fixture changes, compare the appropriate vise and workholding options rather than forcing one design to handle every job.
Explore JIYAN’s CNC vise range and related workholding solutions to identify options that fit your machining application.