
How to Reduce CNC Setup Time: 7 Proven Strategies That Pay Off in the First Week
How to Reduce CNC Setup Time: 7 Proven Strategies That Pay Off in the First Week
If you run a job shop, the fastest way to reduce CNC setup time is to stop re-indicating workholding at every job change. A zero point clamping system locates vises, fixtures, and pallets in the exact same position on the table within ±0.005 mm (0.0002 in), so a changeover that used to eat 20–40 minutes drops to under two minutes. Below are seven strategies that target the parts of setup that actually cost you spindle hours — and most of them pay for themselves in the first week.
Setup time is the gap between “the last part of job A is done” and “the first good part of job B is running.” It covers unloading, cleaning, fixture change, indicating, tool loading, first-article inspection, and the nervous re-zeroing we all do “just to be safe.” On a typical three-axis mill running short batches, that gap is often 30–60% of the clock — time you are paying for the machine, the programmer, and the floor space without shipping a single part. When owners ask how to decrease CNC setup time, the honest answer is rarely “buy a faster machine” — it is “stop relocating the same fixtures by hand.”
This guide is written for the people who actually stand at the machine: owners of small and mid-size shops, setup operators, and the engineers who spec their workholding. No theory you can’t use Monday morning.
What “setup time” really includes (and where it hides)
Before you can cut it, you have to see it. Break a changeover into its real steps and time each one for a week:
| Step | Typical time (manual) | Where it hides |
|---|---|---|
| Unload finished part + fixture | 3–6 min | Often counted as “part of the job” |
| Clean table, bolts, chips | 2–4 min | Skipped when rushed → next crash |
| Locate + indicate new fixture | 8–20 min | The single biggest lever |
| Load + touch off tools | 5–12 min | Tool presetting removes most of it |
| First-article check + re-zero | 4–10 min | Anxiety, not necessity, drives this |
| Total | 22–52 min | Mostly locating + indicating |
The table tells the story: the work that adds value — cutting metal — is the smallest slice. The work that moves a fixture into the right place is the largest. Every strategy below attacks a row in this table.
Strategy 1: Standardize workholding on a zero point clamping system
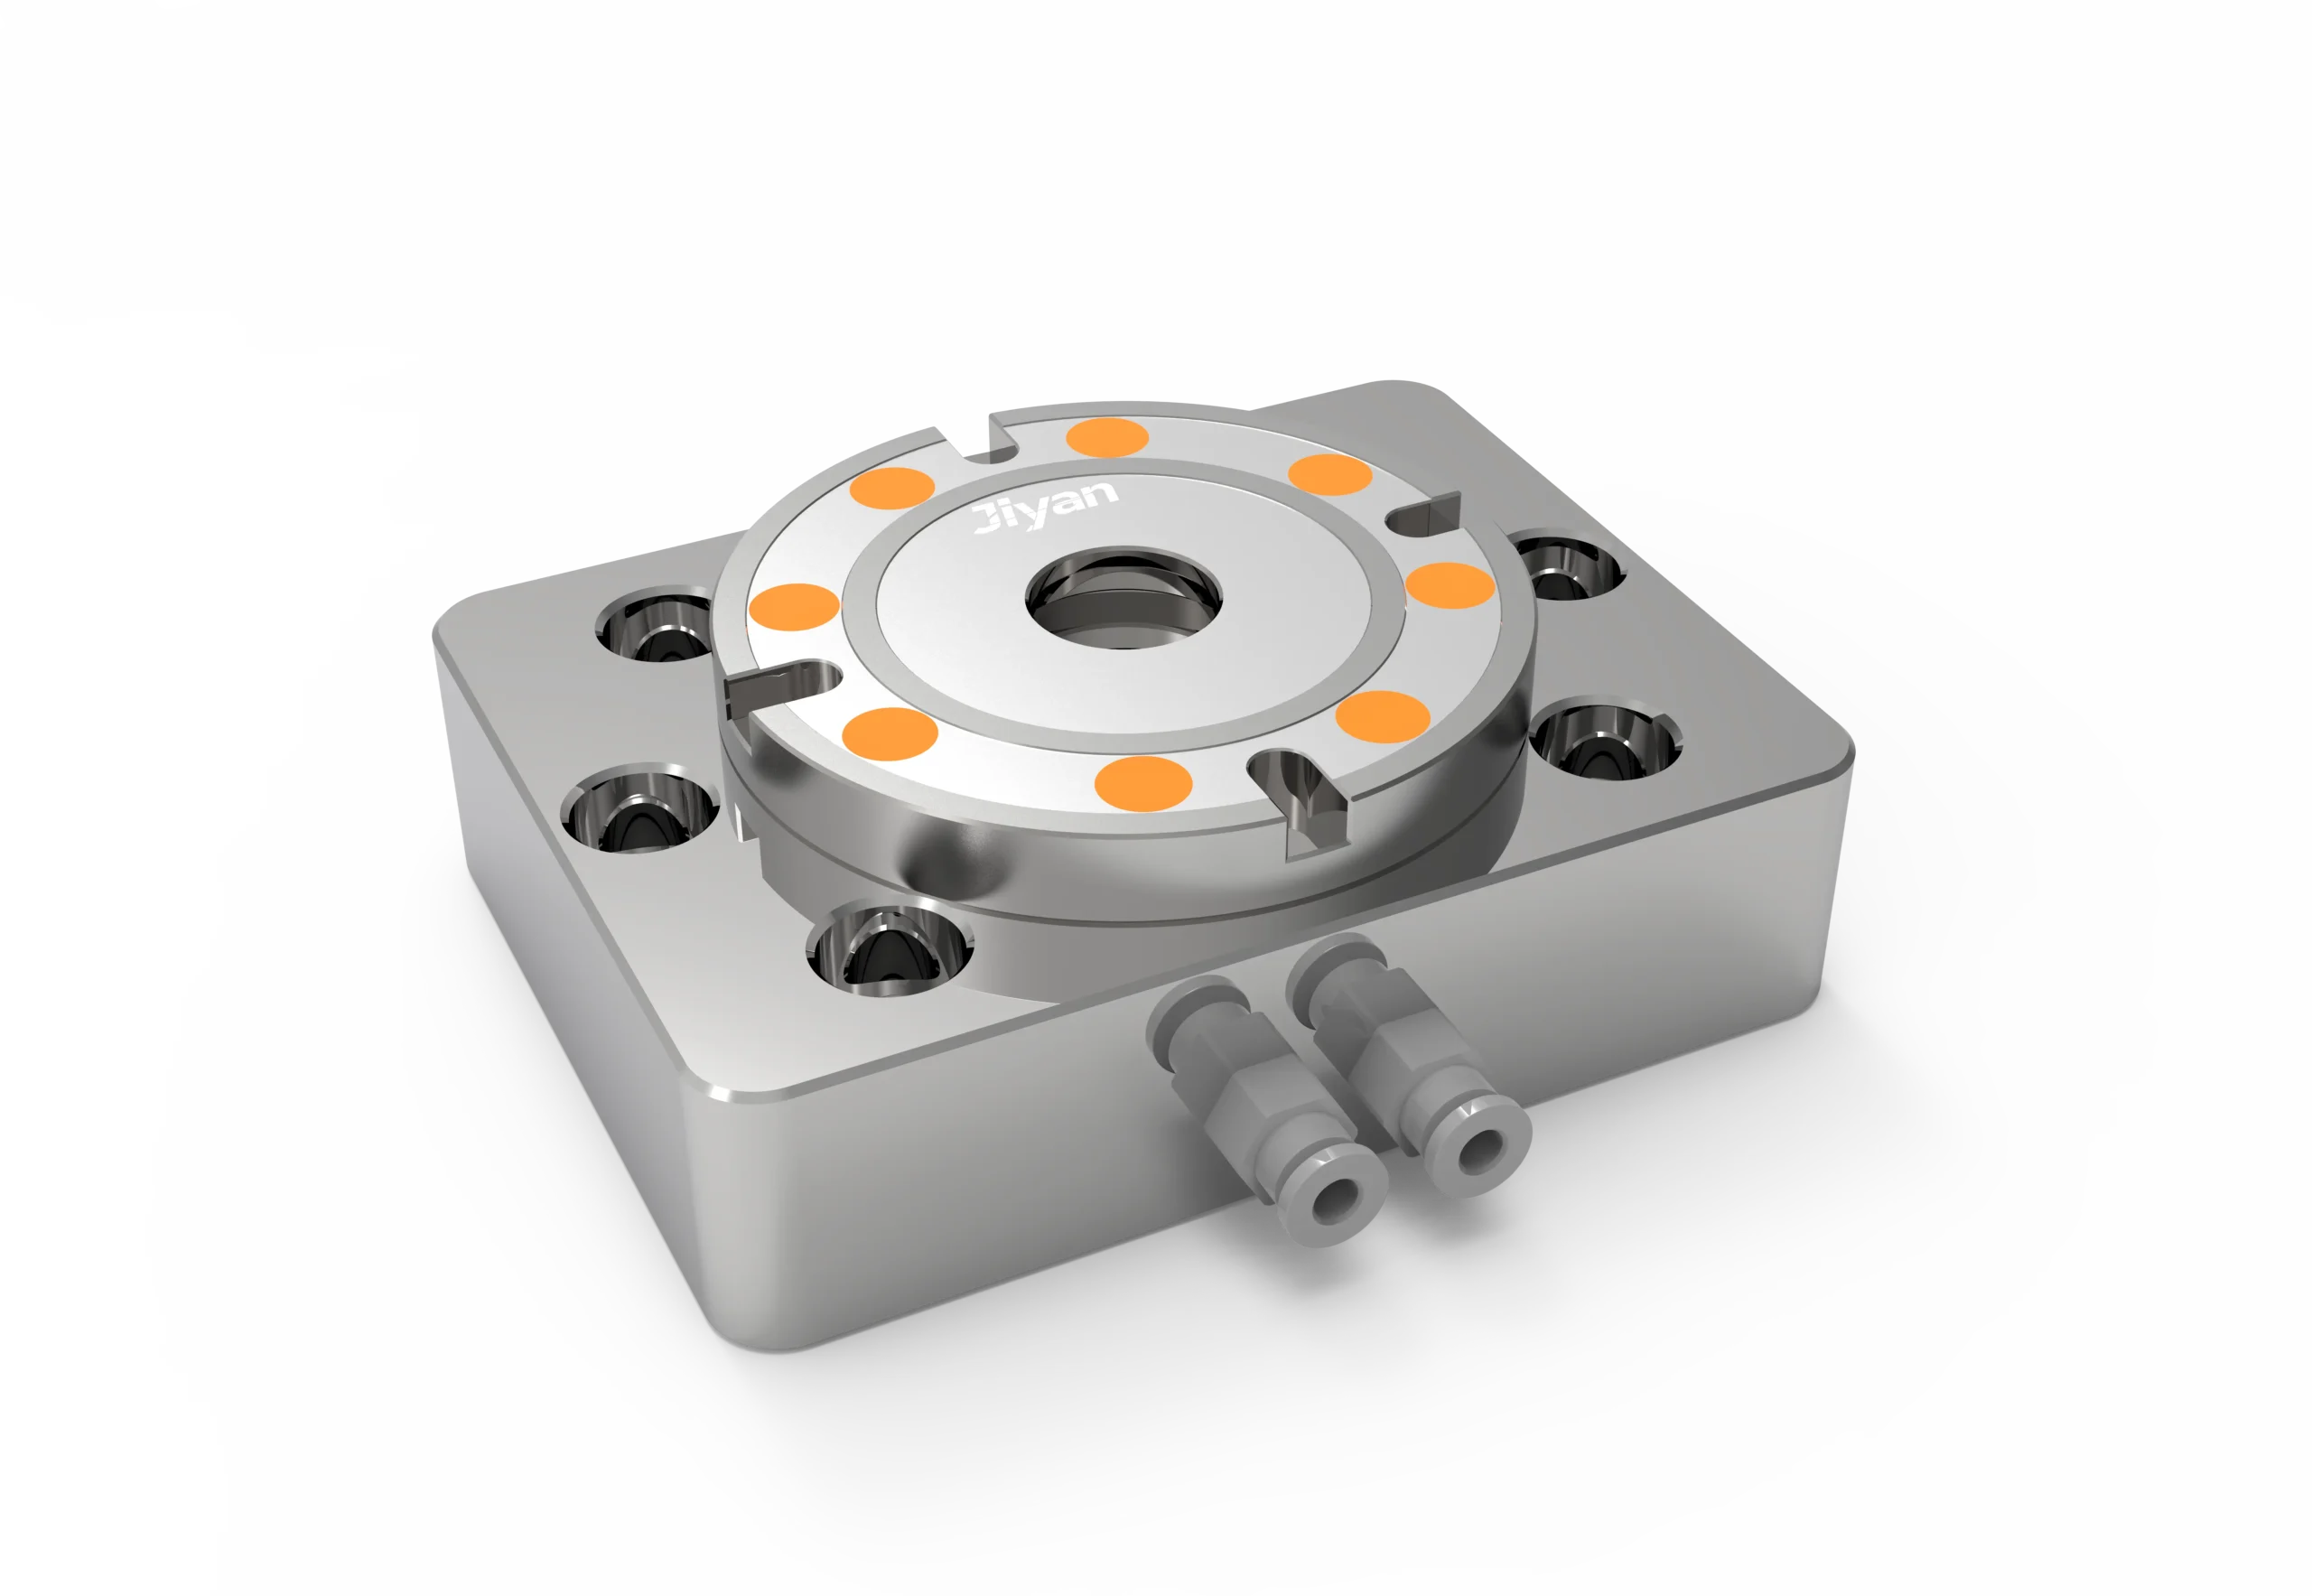
This is the highest-leverage move on the list, so it comes first. A zero point clamping system replaces the ritual of “bolt it down, then sweep it in” with a repeatable interface. You mount a zero point plate to the table once. Every vise, sub-plate, or pallet gets a matching receiver (or studs). Drop it on, lock it, and the position is identical to the last time — no indicating, no re-zeroing.
How much does that save? In our shop, a fixture swap on a three-axis mill went from roughly 18 minutes of indicating to about 90 seconds of “set it and forget it.” Across 8–10 changeovers a day, that is two to three hours of spindle time recovered per machine, per day.
The strategic single here is the TS96-276 Zero-Point Clamping Base. It is built in-house at JIYAN’s Chang’an, Dongguan plant — machining, heat treatment, grinding, and inspection all under one roof — so the reference surfaces hold their ±0.005 mm repeatability instead of drifting after a few hundred cycles. Browse the zero point clamping plates and studs to match a base to your table, or see our full write-up on how a zero point clamping system works and the setup-time savings it delivers.
Mini-story: a shop we work with in Ohio runs 50–200 part batches of aluminum brackets. Before zero point, their operator spent the first 25 minutes of every morning re-indicating three vises. After moving to a zero point plate, that became a 3-minute “click-and-verify” — and they stopped blaming the vise when a first article was off.
Strategy 2: Use a self-centering vise to kill indicating entirely
Even after the plate is located, a traditional vise still makes you indicate the jaw so the part sits centered. A self-centering vise removes that step: both jaws move symmetrically, so the workpiece centers itself on the same axis every time. You drop the raw stock in, close the vise, and the datum is where it was yesterday.
For round or square stock that must sit on a known centerline, this is the difference between “sweep for 6 minutes” and “close and cut.” It pairs perfectly with Strategy 1 — mount the self-centering vise on a zero point sub-plate, and the whole assembly drops into a known location with a known centerline. If you are still deciding between a self-centering and a conventional vise, our self-centering vs. traditional CNC vise comparison breaks down the trade-offs by batch size and part shape.
The savings here are quiet but real: on a single vise, indicating the jaw is often 4–8 minutes. Multiply by multiple vises per changeover and you are back to 15–20 minutes saved.
Strategy 3: Go pneumatic dual-station so the machine cuts while you load
The most powerful way to reduce CNC setup time is to make setup happen while the machine is already cutting. A pneumatic dual-station vise holds two parts (or two fixtures) on one base. Station A machines while you load and clamp Station B. When Station A finishes, you index the base and Station B is already in position — no wait, no open door idle time.
This is SMED (Single-Minute Exchange of Die) thinking applied to milling: you move the non-cutting work off the critical path. On long single parts it may not help, but for short, repetitive batches it can lift machine utilization from ~55% to ~85% without buying a second spindle.
JIYAN’s pneumatic dual-station units run on shop-air and lock with a repeatable position, so Station B picks up exactly where Station A left off. Browse the pneumatic and dual-station workholding options to see what fits your table.
Strategy 4: Preset and pre-stage everything offline
A surprising amount of setup time is spent standing at the machine doing things you could have done at a bench. Two fixes:
- Tool presetting. Measure tool lengths and diameters off the machine with a presetter (or even a simple height gauge + database). Instead of touching off each tool at the spindle, you load a tool and the offset is already correct. This removes 5–12 minutes per changeover.
- Shadow boards and kitting. Lay out the exact collets, parallels, studs, and wrenches a job needs on a board shaped to each tool. The operator grabs the whole kit in one pass instead of hunting drawers. Pre-staged fixtures sit on a cart by the machine, not in a distant rack.
Offline presetting is cheap to start — a presetter pays for itself in weeks once you stop touching off tools by hand.
Strategy 5: Write a real setup sheet (and actually use it)
“We’ve done this job before” is how setup time creeps back. A one-page setup sheet turns tribal knowledge into a repeatable routine:
- Fixture name + zero point stud pattern
- Tool list with pre-measured offsets
- Clamp torque and jaw opening
- First-article dimensions and the safe starting point
When the same job comes back in three months, the second setup should be faster than the first. Shops that keep setup sheets typically shave another 20–30% off repeat jobs because nobody re-discovers the “right” way each time. Store the sheet with the fixture so the two never get separated.
Strategy 6: Batch by family — run similar jobs back to back
Changeovers are expensive; the fewer you do, the more you cut. Group incoming orders into “families” that share fixtures, tooling, or material, and run them in one block. One fixture stays mounted for a whole morning instead of being swapped four times.
This is the scheduling half of SMED. It does not require new hardware — just a discipline of asking “what else can I run on this exact setup?” before you tear it down. Shops that family their work often cut total weekly setup time by a third without touching a single vise.
Strategy 7: Measure it, then attack the biggest slice
You cannot improve what you do not time. For two weeks, write the clock time of every changeover on a whiteboard by the machine. Plot the top offenders. Almost always, the longest changeovers share one cause — a fixture that will not locate, a tool that was not preset, or a part that needs re-indicating.
Spend your energy on the top two or three, not the average. A Pareto here is brutally honest: fix the worst 20% of changeovers and you recover most of the lost spindle time. This is also how you justify the investments in Strategies 1–3 — the numbers make the payback obvious to whoever signs the PO.
How the seven strategies stack up
| Strategy | Up-front cost | Time saved per changeover | Payback |
|---|---|---|---|
| Zero point clamping system | Medium | 15–20 min | Days–weeks |
| Self-centering vise | Low–medium | 4–8 min | Weeks |
| Pneumatic dual-station | Medium | Moves load off critical path | Weeks |
| Offline tool presetting | Low | 5–12 min | Weeks |
| Setup sheets | Near zero | 20–30% on repeats | Immediate |
| Family batching | Near zero | Up to 1/3 of weekly setup | Immediate |
| Measure + Pareto | Near zero | Targets the worst 20% | Immediate |
Notice the pattern: the zero-cost habits (sheets, batching, measuring) compound the hardware investments. Do the cheap ones first to free cash and attention, then add zero point and self-centering workholding where the volume justifies it.
Putting it together on a real floor
A balanced rollout looks like this: week one, start timing changeovers and writing setup sheets (Strategies 5, 6, 7 — cost you nothing). Week two, add a tool presetter (Strategy 4). Month two, mount a zero point plate and a self-centering vise on your highest-volume machine (Strategies 1, 2). Quarter two, add a pneumatic dual-station where batches are short and repetitive (Strategy 3).
Done in that order, reduce CNC setup time stops being a slogan and becomes a number you can show on the monthly report — often 50–70% lower changeover on the machines you touch first. Most shops recover the cost of the first zero point plate inside the first month, because the time it frees shows up as extra parts shipped, not as a line item they have to explain.
Five mistakes that quietly add setup time back
Even shops that buy the right hardware lose the gains to a few bad habits. If your changeovers keep creeping longer, check this list before you buy anything else:
- Re-indicating “just to be safe.” If the fixture is on a zero point plate or a self-centering vise, the position is known. Re-sweeping it wastes 5–15 minutes and trains the next operator to distrust the system. Verify once, then trust it.
- Mixing stud patterns across machines. A zero point plate is only fast if every sub-plate uses the same stud layout. When Plate A takes TS96 studs and Plate B takes something else, you are back to hunting hardware. Standardize the interface shop-wide.
- Touching off tools at the spindle. This is the easiest habit to break and one of the biggest silent time sinks — 5–12 minutes per changeover that a presetter removes entirely. See Strategy 4.
- Tearing down a fixture for one odd part. If a different job needs the same vise next, leave it mounted and family-batch around it (Strategy 6). Every teardown you avoid is a full locate-and-indicate you skip.
- No baseline number. If nobody times the changeover, nobody notices it grew from 22 to 38 minutes. The whiteboard timer from Strategy 7 is what keeps the other six strategies honest.
Fixing these five costs nothing and often recovers as much time as a hardware purchase. It is also the part most competitors skip — which is exactly why a disciplined shop can cut milling setup time below shops running fancier vises.
For the fundamentals of choosing the right vise in the first place, our complete CNC vise guide covers jaw types, accuracy classes, and where a self-centering or hydraulic vise beats a standard screw vise. Pair that reading with the zero point deep-dive and the seven strategies above, and you have a full workholding plan rather than a parts list.
Most of the setup-time savings in this article trace back to the architecture explained in the zero-point clamping system guide.
FAQ
How much can a zero point clamping system reduce CNC setup time?
In real shops, moving from bolt-and-indicate to a zero point interface cuts fixture changeover from roughly 18–20 minutes to under 2 minutes — a 90% reduction on that step. Across a day of short batches, that recovers two to three hours of spindle time per machine. The exact number depends on how much of your changeover was indicating versus loading.
What is the cheapest way to reduce CNC setup time with no new equipment?
Start with setup sheets, family batching, and timing every changeover (a Pareto). Those three habits cost almost nothing and typically cut repeat-job setup by 20–30% and weekly setup by up to a third, before you buy any hardware.
Does a self-centering vise really eliminate indicating?
For round or square stock that must sit on a known centerline, yes — the jaws move symmetrically so the part centers itself every time. You still locate the vise on the table (a zero point plate makes that instant), but you no longer sweep the jaw. Expect to save 4–8 minutes per vise per changeover.
How does a pneumatic dual-station vise save time if it does not change faster?
It moves loading off the critical path. Station A machines while you load Station B; when A finishes you index and B is already clamped. On short repetitive batches this lifts machine utilization from roughly 55% to 85% without a second spindle.
Is reducing setup time worth it for low-volume prototype work?
Less so. The strategies pay off where changeovers are frequent — short batches, repeat jobs, high-mix floors. For one-off prototypes, the bigger win is usually offline programming and fixturing design, not changeover speed. Start with the zero-cost habits and add hardware only where volume justifies it.
Talk to a workholding engineer
The fastest path to cut your milling setup time is usually one zero point plate on your busiest machine plus a self-centering vise. Talk to JIYAN workholding engineers about a setup sized to your tables, or read the deep dive on how a zero point clamping system works before you spec.
Less indicating, more cutting — start with one plate.
About this guide
This article was written and reviewed by the JIYAN Workholding Engineering Team, based on in-house manufacturing experience at our ISO 9001 facility in Dongguan, China. JIYAN designs, machines, heat-treats, and inspects precision CNC vises and zero-point clamping systems for machine shops in 40+ countries. If you have a specific fixture or setup-time challenge, contact our engineers.
Also read: CNC Workholding for Small Shops: 7 Setup-Time Strategies
Also read: 5-Axis Workholding: How to Hold Parts So Your 5th Axis Actually Pays Off
Related guide: Pneumatic Dual-Station Vise: How a 2-Station CNC Vise Doubles Your Spindle Time